Hey, it’s Friday again! Which means not long to go to the weekend… Yay! We’ve been scrolling through some old articles once
We all know bikes are meant to be ridden, but sometimes we have no choice but to transport them by other means. Today we explain the dark art of loading and unloading a bike from your transporter – without the bike ending up on top of you…
“By failing to prepare, you are preparing to fail”. It’s one of the great Benjamin Franklin’s most famous quotes, and it’s just as relevant to motorcycling in this case as it is to anything else. Yep, when it comes to loading a bike – whether it’s into the back of a van, ute or onto a trailer – if you don’t take your time and plan ahead, things can go very pear shaped, with expensive consequences.
While here at BRM we tend to load bikes into the back of a van far more than any self-respecting group of motor-noters should, we have become quite good at it. So, if you’re going to transport your bike instead of ride it, learn from our mistakes instead of making your own.
It’s All In The Preparation
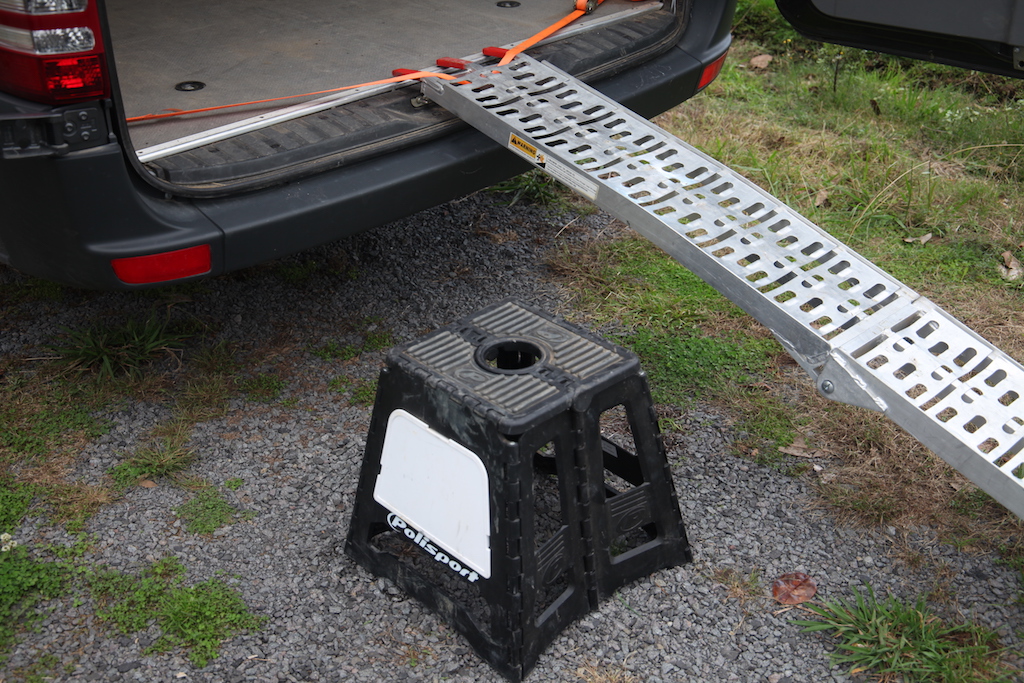
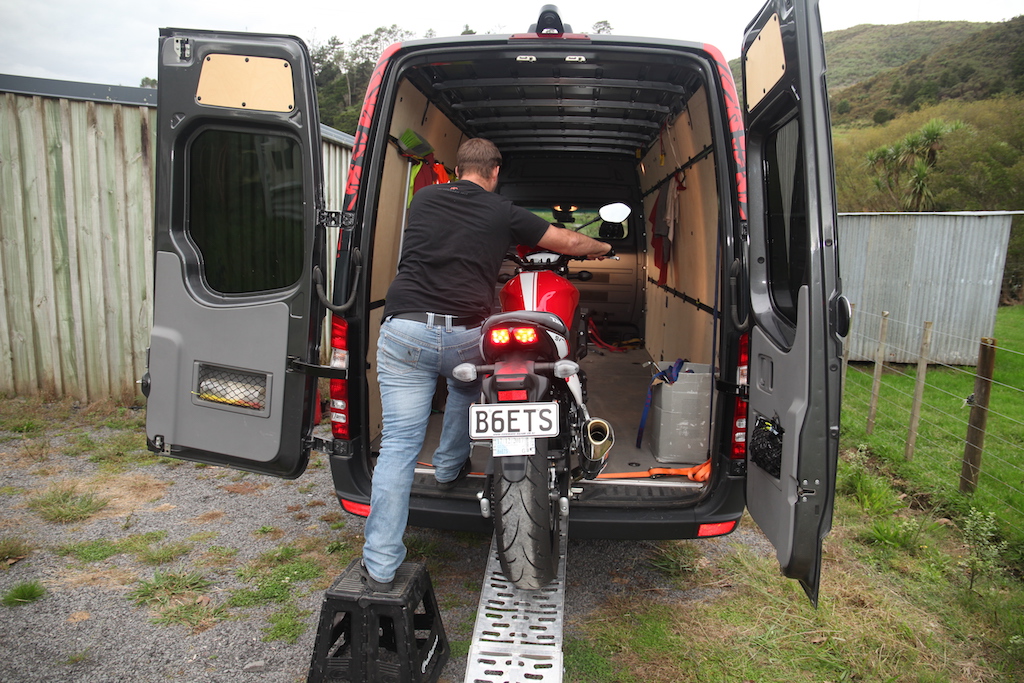
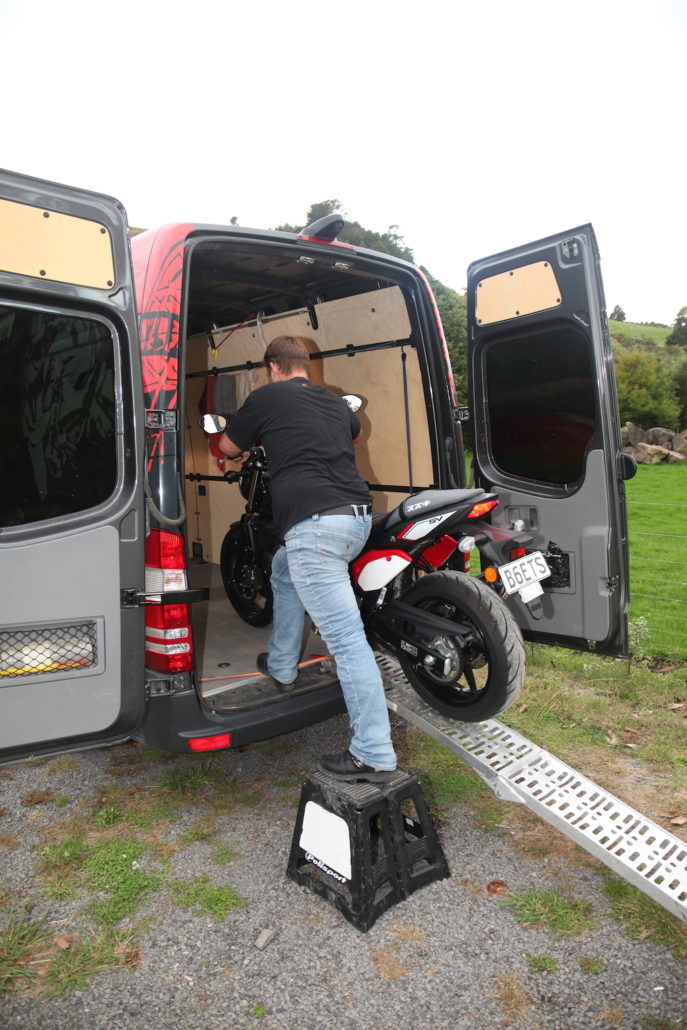
Before you even line your bike up to load it up, you’ll want to ensure that everything is ready to make the operation a smooth one. You’ll want to have your ramp secured in place, a step next to the ramp to help you step up with the bike (or another ramp to walk up), your tie downs within easy reach once your bike is up the ramp and in your van/trailer, and importantly, a helper to watch your back. You really don’t want to rush this job and end up underneath a 200kg bike on the ground…
Take Your Time
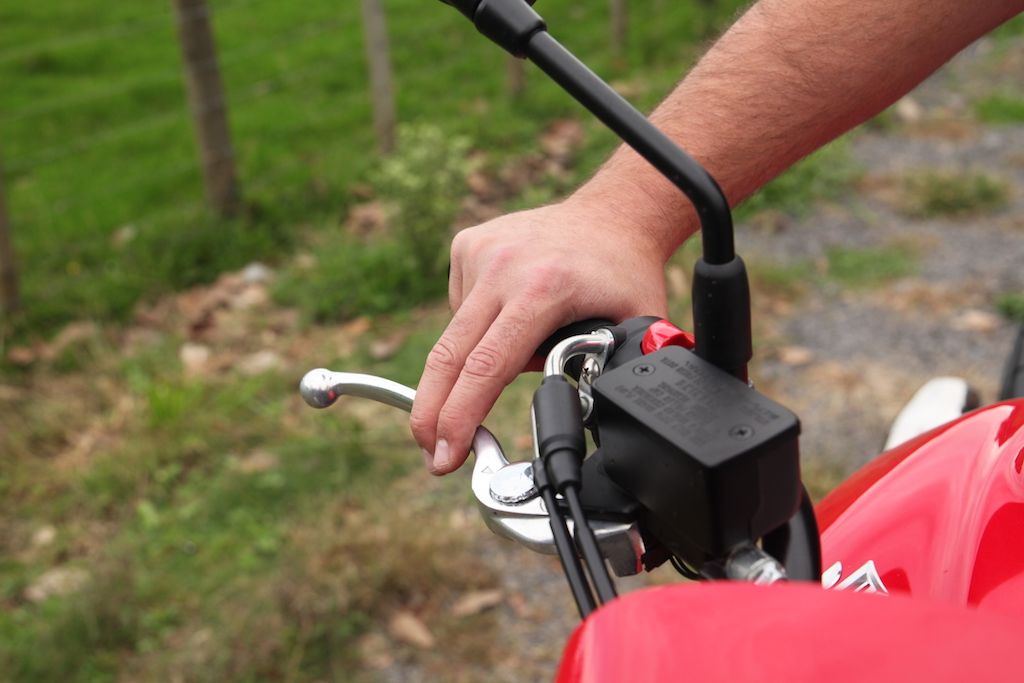
“Only fools rush in”, so take your time to carefully line the bike up with the ramp. If you have a helper we reckon it’s best to push the bike up the ramp, with your helper pushing and you steering. But if you have to load your bike up by yourself, you want to go slowly using the clutch alone to control the bike’s forward momentum while covering the front brake, just in case you need to stop. Once up the ramp you can either get your helper to hold your bike upright while you tie it down, or put your bike on its stand and get on with the job. Just remember, as counterintuitive as it sounds, you never want to secure your bike down on its side-stand, as this will prevent you from tying your bike down securely.

Where To Tie
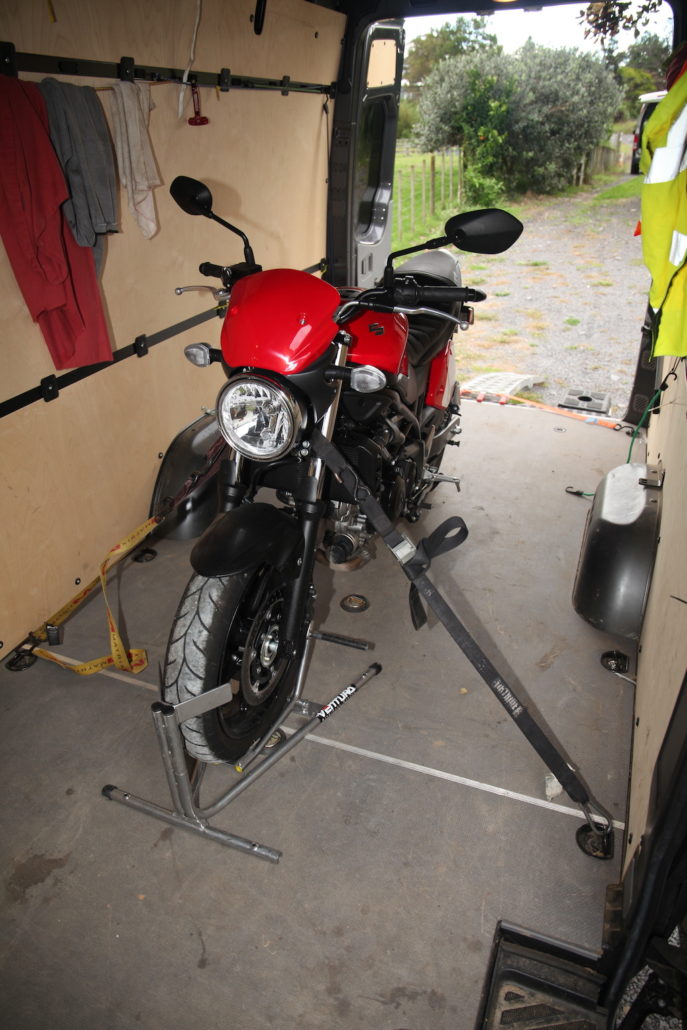
Obviously, each bike is different, but as a rule, you’ll want to tie your bike down from either side of the handlebars and the front wheel. The reason we tie the front wheel is to prevent it moving – if it twists during transit any tension you have on the ‘bars will be lost and the bike will come crashing down. After you’ve secured your front wheel, you’ll want to tie down your bike from either the handlebars, or if you have a bike with clip-ons, the lower triple clamp. Here you want to tie down to a point in front of the front axle, and compress the forks in the process. With the forks under tension they will keep the bike stable on the road while also preventing your tie downs from loosening off. If you’re tying down off the ‘bars, make sure that the throttle doesn’t twist in the process as you don’t want any undue stress on your throttle bodies.
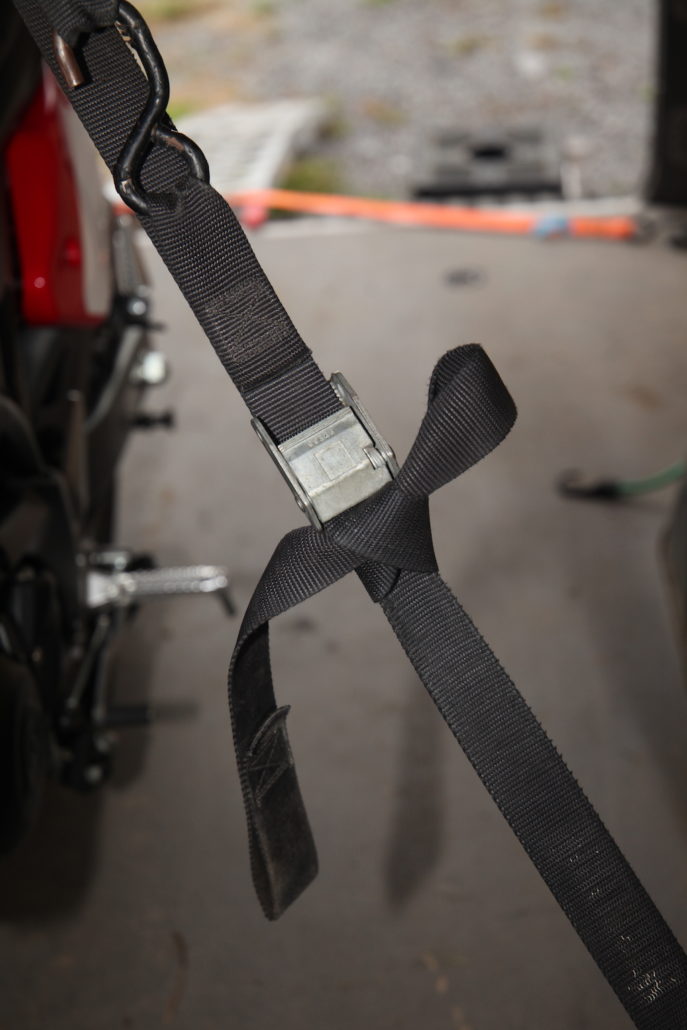
Once you’ve got the bike strapped down and you’re happy it’s not going to move – the forks need to be compressed but not on their bump-stops – do a half hitch with the strap so if the fastener fails, the strap won’t come loose.
If you’re using a trailer, tie the rear wheel down for good measure to prevent the rear wheel bouncing and moving sideways, as a bouncing rear wheel can have the same effect as a loose front wheel.
Unloading
When it comes to unloading your bike, the same rules apply. Don’t rush your unloading process and be well prepared. Have your ramp secured, a box or step to step down on, and if possible a helper to guide you down the ramp and ensure you don’t drop the bike. Place the bike in gear and pull the clutch in before you start walking the bike back. You want to use the clutch as a brake as it will slow the rear wheel, which will keep the bike more stable than the front brake. Slowly walk the bike down the ramp, making small adjustments at the ‘bars if necessary to keep in line. Here it is great to have a helper so they can also make sure you stay lined up with the ramp.