
- Factory suspension settings are rarely ideal for NZ riders or roads
- Correct tyre pressures and sag setup dramatically improve bike feel
- Suspension setup mistakes are one of the biggest causes of poor handling
Think your brand-new sportsbike is ready to ride straight out of the showroom? Suspension specialist Leroy from Darkart Motosport begins a series of articles for BRM by explaining why factory settings are only the starting point.
You’ve done it. After months of YouTube reviews, forum arguments, and maybe a few sleepless nights, the new bike is in your shed. R1, GSX-R, ZX-10R, Panigale — whatever poison you picked. It’s shiny, it smells new, and the dealer just handed you the keys with a smile.
Here’s the bad news: it’s not ready.
I don’t care if it’s a $35k superbike. Out of the crate, your suspension is set for a mythical rider that doesn’t exist. Factory settings are a compromise built for a 75kg test rider on a perfect track at 20 degrees, running OEM tyres. That’s not you, and it’s not NZ roads.
I see it every week at our workshop. A guy rolls in on a three-month-old bike, complaining of a “vague front end”, “harsh feel over bumps”, or “tyres have no traction”. We check the bike and find 28mm of rear sag, clickers almost closed, and 46psi in the rear tyre. The bike wasn’t the problem. The setup was.
So before you scrub those chicken strips, spend 20 minutes in the shed. These four checks will make your first ride 10x better, save your teeth, reduce chiropractor visits, save your tyres, and give you a baseline that actually means something. You don’t need special tools, and you don’t need to be a tech. You just need a mate, a tape measure, and a bit of honesty about your weight.
“Out of the crate, your suspension is set for a mythical rider that doesn’t exist.”
1. Tyre Pressures: The Sticker Is Lying to You
Flip open your manual or check the swingarm sticker. It’ll say something like 36–38psi front, 42–46psi rear. That’s a legal number. It’s for a bike fully loaded, two-up, with luggage, sitting on the motorway at 100kph. It’s designed to stop the tyre overheating with maximum weight, not to give you feel.
For solo riding, it’s way too hard. The tyre can’t flex, so your contact patch is tiny. You get less grip, worse feedback, and the bike skates over bumps instead of soaking them up.
Here’s where to start for road riding in NZ on modern sport tyres like Diablo Rosso IV, S23, or Power 6:
Road cold pressures
32–34psi front / 34–36psi rear
If it’s wet or cold, maybe 32/34. If you’re 100kg+ with gear, 33/33. But 32/35 is the baseline.
Buy a decent digital gauge. The $10 AliExpress ones are junk, and the gas station pumps aren’t accurate either. Check pressures cold, before you ride. Do it every ride day. It’s the cheapest performance mod you’ll ever make.
2. Sag: The One Number That Rules Everything
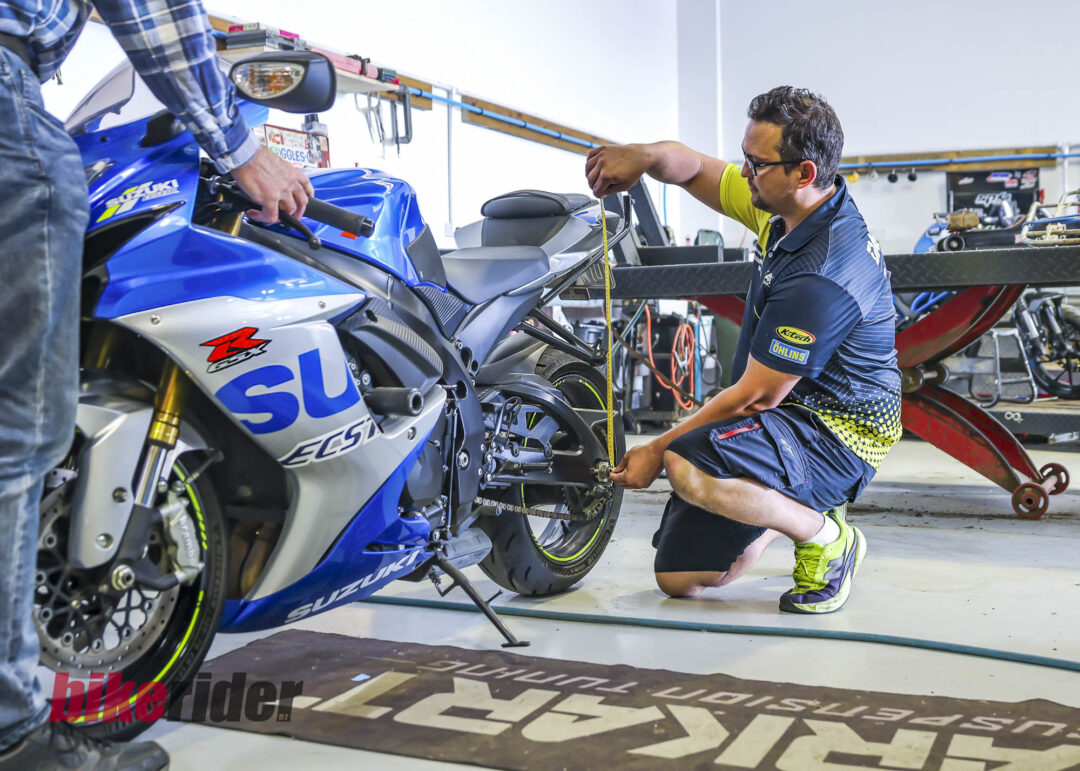
If you do one thing from this article, make it this. Sag is how much the bike drops under its own weight (static sag), and then with you on it (rider sag). It sets ride height, balance, and how much travel you have left for bumps. Get it wrong, and nothing else you do with clickers will fix the bike.
You need two measurements:
Static sag
Bike only, no rider. Lift the rear until the wheel is off the ground, then measure from the axle to a point on the tail. Make a mark so you measure from the same point each time.
Call it 600mm.
Put the bike down, bounce it, let it settle. Measure again. Maybe 575mm.
600 – 575 = 25mm static sag.
Rider sag
Use the same two points, but now sit on the bike in full gear, feet on the pegs, in your riding position. Get a mate to hold you upright.
Measure again — you might need two mates.
Say 545mm.
600 – 545 = 55mm rider sag.
Adding preload reduces the sag number. Removing preload increases it.
So what’s good?
“80% of new bikes are undersprung for NZ riders because we’re not all 75kg.”
For a modern sportsbike
Road setup I like to use as a tuner
Front rider sag | 38–42mm
Rear rider sag | 32–36mm
Rear free sag | 10–15mm
If your rider sag is way bigger than those numbers and you have to add a ton of preload to achieve it — but then there is little to no static sag — your spring is too soft. If you have a small rider sag number with no preload, then your springs are too hard.
I had a Yamaha R1 in last month. An 85kg rider with gear. Rear rider sag was 22mm. He’d been chasing a harsh and vague front end for six months, removing compression damping and changing tyres. We put the right spring in for his weight, set 35mm rider sag, and he texted me after the next ride: “It’s a new bike.”
We then opened up the damping clickers with the correct spring and sag setting.
How to adjust
On the rear shock, you’ll see two big nuts on the spring, although some shocks have a hydraulic preloader. The top one is a lock nut. Crack it loose with a C-spanner, then wind the lower one down to add preload, or up to remove it.
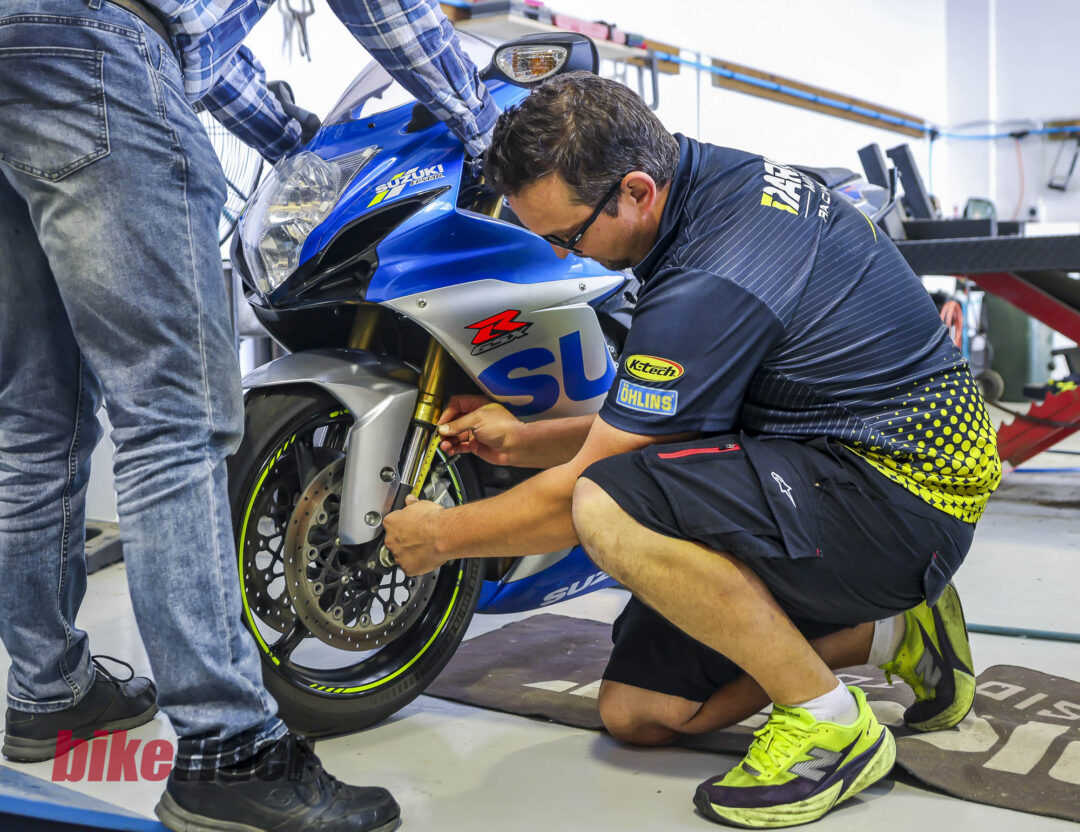
Front forks usually have a 14mm or 17mm adjuster on top.
Clockwise = more preload = less sag.
If you can’t hit the numbers, you need springs. We’ll cover that in Part 2. But 80% of new bikes are undersprung for NZ riders because we’re not all 75kg.
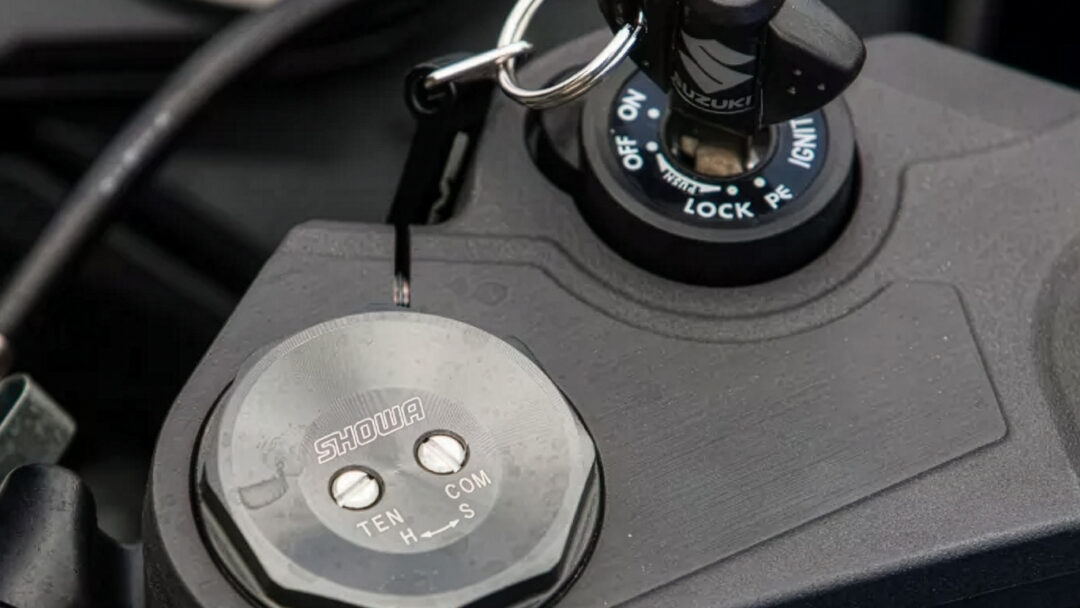
3. Clickers: Zero Them So You Know Where You Are
Dealers don’t know. PDI usually means “check it runs and doesn’t leak”.
I’ve seen brand-new bikes with rebound eight clicks different left to right on the forks. I’ve seen compression wound fully hard from the factory. You have no idea where you’re starting from.
So step one: set everything back to stock as a baseline. It’s in your owner’s manual under “Suspension”.
Usually something like:
Front compression | 8 clicks out from full hard (closed)
Front rebound | 10 clicks out
Rear compression | 12 clicks out
Rear rebound | 10 clicks out
To do it, wind the adjuster clockwise gently until it stops. Don’t crank it. That’s “full hard” or “zero”. Now count clicks out anti-clockwise. Write it down in your phone. Now you know where you are.
Rule for adjusting later: one change at a time, two clicks maximum. Go for a ride and feel the difference. If you change compression, rebound, and preload all at once, you’ll never know what worked.
What do they do?
Compression: Controls how fast the suspension compresses when you hit a bump. Too soft and the bike dives or wallows. Too hard and it feels harsh or skips over bumps.
Rebound: Controls how fast it comes back up after a bump. Too fast and the bike feels bouncy or pogo-like. Too slow and the suspension “packs down” over repeated bumps and gets harsher.
For your first ride, leave it stock once you’ve got a proper base setting. You need to feel the bike before you start changing things.

4. Make It Fit You: Controls, Levers, Bars
This isn’t strictly suspension, but it affects how the bike feels and how you load it. If your bars are rolled too far forward, you’re putting extra weight on the front. If your brake lever is too high, you’re grabbing a handful mid-corner.
Take five minutes & get it set up right
Levers
Sit on the bike with your hands on the grips. Your fingers should fall naturally onto the levers without your wrist breaking up or down. Loosen the clamp and rotate them. Most riders run them too high.
Rear brake
You should be able to comfortably cover it without lifting your foot off the peg. Adjust the height bolt if needed.
Bars
Loosen the clamps slightly and rock them forward or back. Find the position where your arms have a slight bend and you’re not locked out. Then nip them back up.
If the bike fits you, you’ll ride it smoother. Smooth equals fast. If you’re fighting the ergonomics, you’ll blame the suspension when it’s really your body position.
“Your first impressions will actually be valid because the bike isn’t sabotaging you.”
So What Now?
Do these four things. It’ll take you longer to read this than to actually do it.
- Set 32/35 cold for the road.
- Measure and set your sag. Be honest about needing springs if you’re not in the window.
- Zero your clickers to stock and write it down.
- Make the controls fit you.
Now go ride. Your first impressions will actually be valid because the bike isn’t sabotaging you. You’ll feel what the chassis is doing instead of fighting a bad setup.
And here’s the important bit: write down what you changed. Phone notes, a piece of tape under the seat, whatever.
Something like, “15/3/26 – Set 32mm rear sag, 12 clicks comp, 10 clicks rebound.”
If you don’t record it, you’ll be lost in three months when you try to fix something.
Next month in Part 2, we’ll talk about damping control and how to know when it’s time to upgrade.
Until then, scrub those tyres in properly — and don’t trust the sticker.
If you’re after suspension help for your ride, you can find Leroy at Darkart Motosport
Pics: Karli Watson Photography