We’re almost back into summer again, which invariably means more of you will be pulling your bikes out of the dusty garage and getting out on the road! More miles on the odometer can only be a good thing – until something doesn’t go to plan. So, we thought we’d dust off an old article that featured in the magazine a while back – what to do in the event of a flat tyre on the side of the road… Read on!
It’s probably one of the most inconvenient things that can happen to you while out on a ride, so what should you do when your tyre goes, POP!
A flat tyre is a massive inconvenience when you’re riding a bike, where unlike a car you’re not carrying a spare wheel to just throw on (unless of course, you’re riding a particularly well thought out classic Italian scooter). That’s where knowing how to fix a flat so you’re able to get yourself to the nearest tyre shop is a skill that you must have, especially when you’re embarking on a longer ride.
Don’t Panic
Picture this, you’re riding along happily, when suddenly you hear a loud bang and your world suddenly feels less stable. First thing to do is not panic break, as with a rapidly deflating tyre your ability to stop safely will be greatly reduced. Slowly ease on the brakes until you come to a stop. Try not to take a corner as you will quickly find you won’t have the stability you’re used to. Once you’ve safely come to a stop it’s time to dismount and get to work.
 Assess the Damage
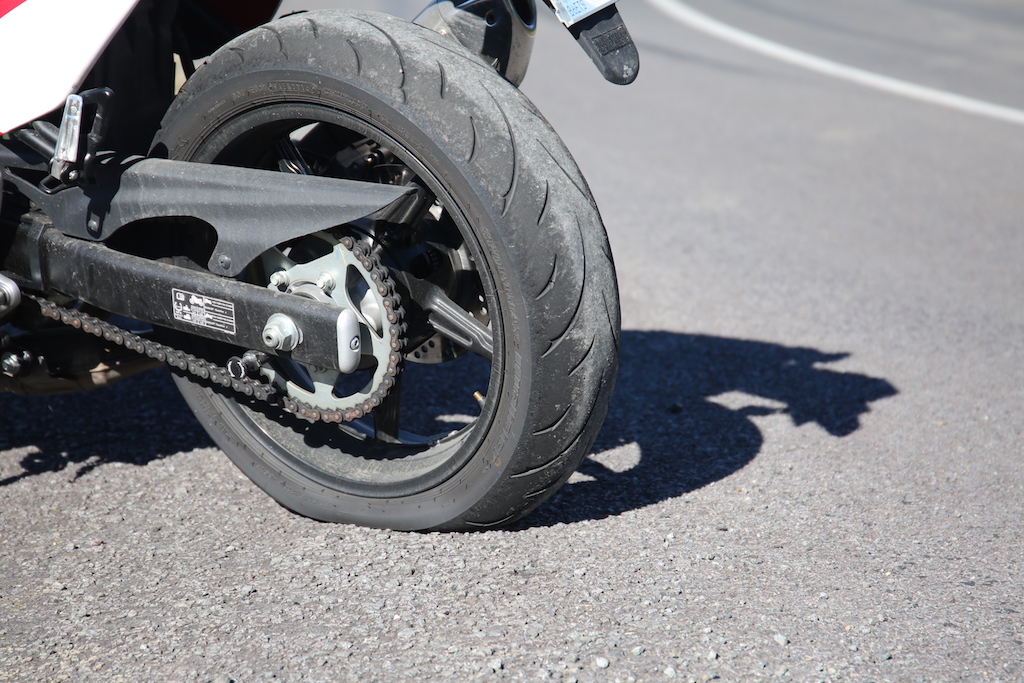
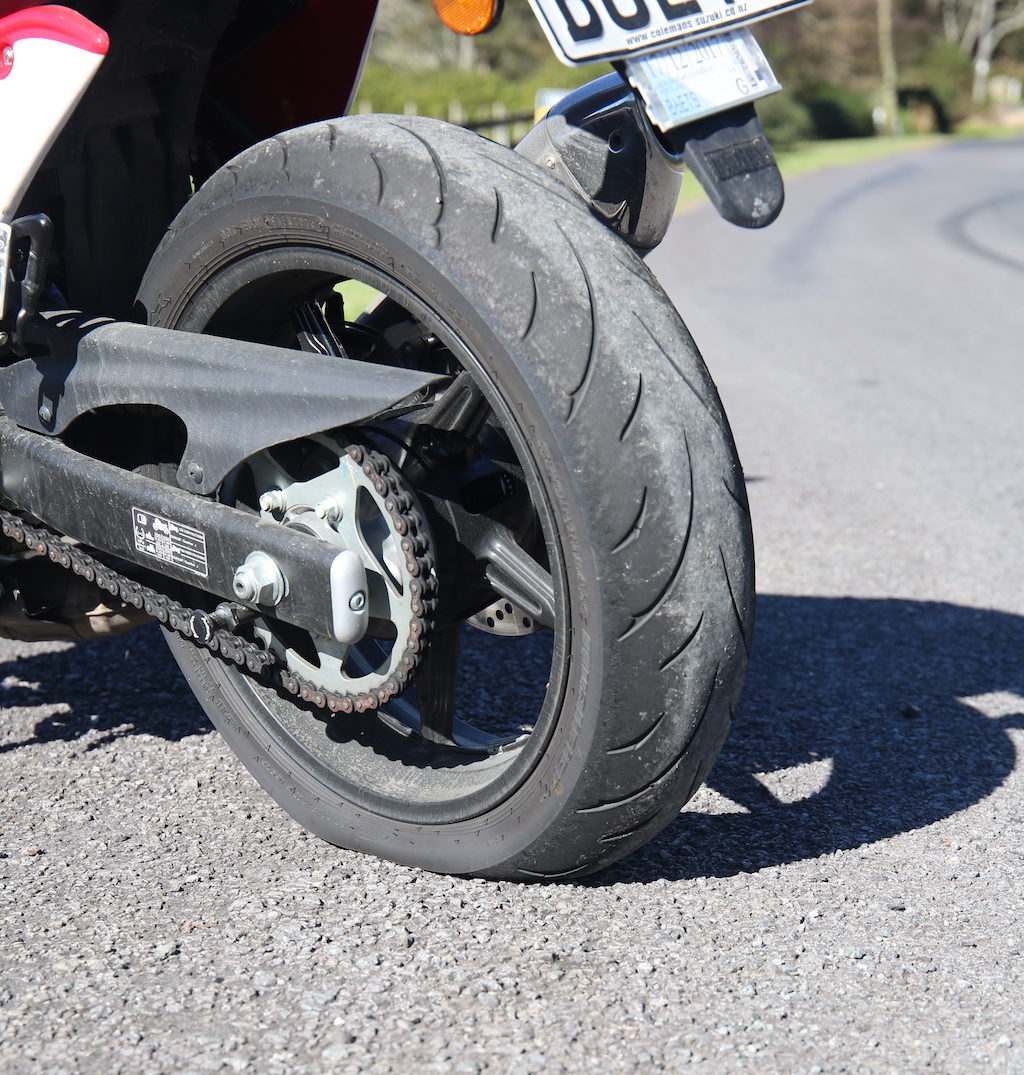
With your bike safely at a standstill your next mission is to discover exactly where the puncture is. The method for this will vary depending on whether you have a tubeless tyre or not. With a tubeless hoop, you should be able to spin the tyre in question until you can visibly see a defect. In most cases it should be pretty easy to find, but if not a little bit of water (or spit, sometimes you’ve got to work with what you’ve got) can help you test suspected areas. If your tubeless tyre has a puncture in the sidewall, sorry to say that tyre is toast and there is no fixing it. Time to call a towie!
If you have a tyre with an inner tube, while you have a lot more work to find the flat – including removing the wheel and then levering off the tyre itself to examine the inner tube – you have more options for a repair. In many cases you can use a patch on the inner tube, replace it within the tyre and be away, or if the damage is serious and you’re the boy scout type (always prepared) you can just swap a nice new tube in. It’s a bit of a pain to go through the whole exercise, but one we deal with for the benefits of a hoop with an inner tube.
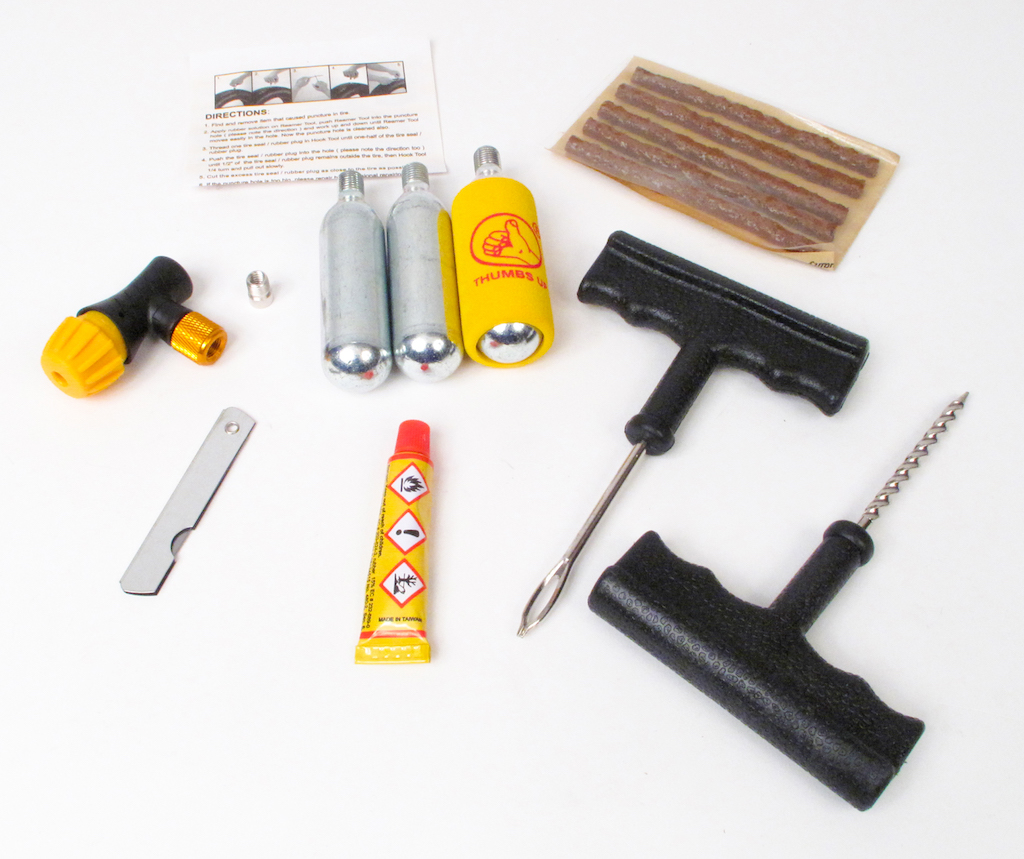
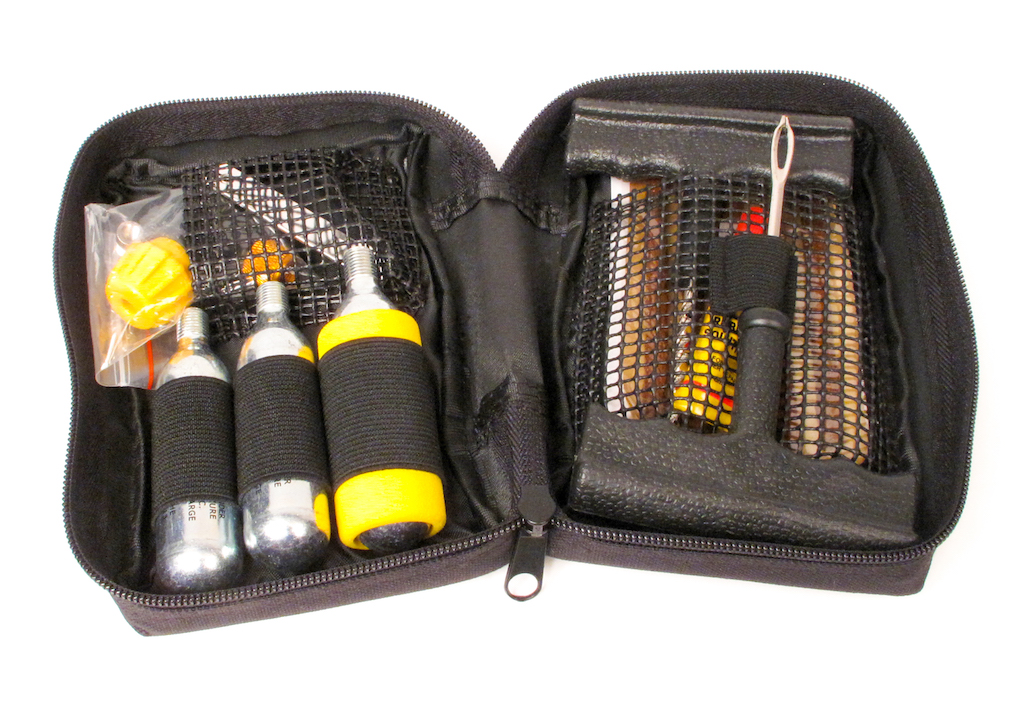
Plug it or Patch it
When it comes to how to repair your hoop it depends on what tools you have at your disposal and what repair kit you have. A tubeless tyre can’t be repaired with a simple patch, with a screw in plug the most effective means for repair. Conversely, a patch or a complete replacement tube is the best way to fix a tubed tyre. There are, of course, other methods, such as tyre glue which can be an effective method on tubeless tyres.
 Don’t blow it
After you’ve patched your hoop, the next item on your ‘to do’ list before you hit the road is to inflate your tyre. Now, you’re unlikely to have a bicycle pump handy (and you can almost guarantee you’ll never get a flat at a gassy), so it’s a good idea to carry compact CO2 canisters under your seat or in your ride bag, just in case. These can inflate your tyre to a point where it can be ridden on, but take up little space on the bike. Just make sure to get the pressure up to the correct setting as soon as you have a chance to prevent excessive wear.
Enough is enough
If your tyre has been punctured once before and you develop a second, it’s time to retire that tyre. More than one puncture weakens the tyre and can potentially put it out of balance. The last thing you want is a tyre that looks like it’s made of Swiss cheese…
 You’re nailed…
If you notice a bit of debris stuck in your tyre, such as a nail or bit of metal, but your tyre has not deflated – leave it be. If you pull it out, chances are you’re going to find out rapidly that you’re in for a flat time. You’ll want to get it fixed, but if you don’t have the kit at hand to do so, limp your bike to the nearest tyre shop and get them to suss it out for you.
You know you’re stuffed when…
Sadly, not all damage can be repaired, so you may be forced to throw in the towel and call a towie in some cases. For instance, if you damage the sidewall there’s no safe way to fix it. Sure, you can cover it up with some sealant goo and hope for the best, but you won’t get far before the stresses your sidewall encounters prove too much for the repair. If your sidewall is damaged, that tyre is toast and you need a new one. Full stop.
In the same vein, if your tyre has a slash in it, chances are you won’t be able to make an effective repair out the back of beyond. DIY tyre repair is best only used and ridden on for simple punctures as you don’t want to be riding around on something that could fail catastrophically. If in doubt, leave it to the pros.